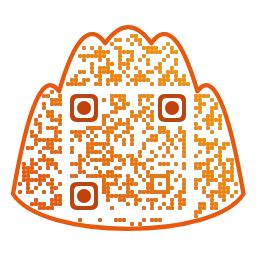
Make a QR Code from a Photo: From Removing the Background to Size and Position
A step-by-step guide to image QR codes: how they work, choosing a good photo, removing the background, zoom and position, brightness and contrast, dot and eye styles, the scan badge, and a pre-print checklist.
- Published
- Updated
An image QR code puts a photo across the whole symbol instead of the usual black-and-white squares, and it gets noticed. A pet, a signature dish or the hero of an event poster shows through the code itself. But not every photo works, and the result depends heavily on which photo you pick, how you clean up its background, and how you size and place it. This guide walks through the image QR feature of Mandu QR in order and explains what to watch for at each step.
What an image QR code actually is
An image QR code lays your photo down as a backdrop and draws the QR data on top as small dots. Each module (one small square cell of the code) becomes a dot sitting over the photo, while the function patterns, such as the three large corner squares called finder patterns, stay as full squares. A camera ignores the photo's colors and simply reads the light and dark contrast of the dots and patterns to rebuild the data.
Because the photo shows between the dots, an image QR code is naturally harder to read than a plain one. To make up for that, Mandu QR always builds image QR codes at the highest error-correction level, H, which the standard describes as able to recover roughly 30% of damaged data. The trade-off is a denser pattern for the same content, so a short address helps a lot.
How to choose a good photo
More than half of the outcome is decided before you touch a single slider. A camera reads the difference between light and dark where the dots sit, so the photo must not fight with those dots.
- Pick a large, simple subject. One person, one product or a logo with a clear outline is easy to recognize.
- Choose a photo with clear light and dark areas. A flat, hazy picture made of mid-tones swallows the dots.
- Avoid busy backgrounds full of small patterns, because the dots and the photo blur together. If the background is cluttered, clean it up with the background eraser described next.
- You can upload PNG, JPG or WebP files. If a PNG or WebP has transparent areas, they are filled with the QR background color.
- Use only photos you took or have the right to use. If you plan to distribute printed copies, double-check portrait and copyright permissions.
Removing the background: tap what you want to keep
After you upload a photo, a background-removal button appears. It never opens by itself; you press it when you want to edit. The editor offers several tools.
- AI tap-to-keep: tap the subject you want to keep and the AI finds its outline. If one tap does not capture everything, tap other parts as many times as you like. Each tap is merged into the AI selection, and the photo keeps its full size from the very first selection.
- Show erased areas faded: this is on by default. Erased areas appear faded instead of gone, and a thin blue outline marks the edge of what you kept. Turn it off and erased areas look transparent. The checkbox only changes how you see the photo; it has no effect on the final result, where erased pixels become fully transparent.
- Erase and restore brushes: wipe away anything the AI missed, and paint back anything it removed by mistake. Brush size runs from 1 to 150 pixels, and the restore brush only brings back what existed in the original.
- Automatic edge background removal: it finds the most common color along the photo's border and removes only the matching background that connects to the edges. It suits solid-color backgrounds, and it leaves the same color alone when it appears inside your subject.
- Undo and reset: each brush stroke is one undo step, with up to 30 steps available, and even a reset can be undone.
The AI model is downloaded only the first time you use background removal, which is why the first tap shows a note that the AI is looking for the subject and may take a moment. After that the same model is reused, and if the AI step ever fails, the eraser and brushes keep working.
Everything happens inside your browser. Your photo, the points you tap and the edited result are not sent to a server or to any outside AI service. When you press Done, the erased areas are filled with the QR background color in the preview, and if you do not like the result you can revert to the original photo. Cancelling the editor leaves your current photo untouched.
Zoom, position, brightness, contrast and dot size
By default the photo sits centered and fills the code. The zoom slider ranges from 0.3x to 8x. Below 1x the photo becomes smaller than the code and the leftover space is filled with the background color. Above 1x only part of the photo is visible and the rest is cropped.
- Zoomed out: the photo can travel to both ends and all four corners of the code. That is handy when you want a small image, such as a logo, tucked into one corner.
- Zoomed in: movement is limited to what keeps the photo covering the code. You use it to choose which part of the photo to show.
- Position: drag the preview directly, or use the horizontal and vertical sliders. Dragging and the sliders share the same movement range, so use whichever is more comfortable.
- When you change the zoom, the position is automatically pulled back inside the new range.
With the position set, it is time to tune the photo so the dots on top stay visible. There are four controls.
- Brightness: lightens or darkens the whole photo, from -1 to 1.
- Contrast: widens or narrows the gap between light and dark, from 0 to 4, with 1 as the default. When a photo looks flat, raising contrast often makes the dots much clearer.
- Image colors: color, grayscale, or grayscale dithering. Color keeps the photo as it is and grayscale converts it to shades of gray. Dithering expresses the brightness of tiny cells as a pattern of black and white, which keeps the photo's light and dark structure. It often scans better because the contrast is crisp, though the photo gets a coarser texture.
- Data dot size: sets how large the dot in the middle of each module is, from about 33% to 50% of the cell. Larger dots are easier for a camera to read and show less of the photo.
If the preview warns that scanning may be difficult, first push the dot size toward 50%; the app's own hint recommends the same. After that, raise the contrast or adjust the brightness, and if that is still not enough, swap in a simpler photo. Note also that an image QR code divides every module into several cells to draw the photo, so it cannot be built when the output size is too small. In that case you need to increase the output size.
Styling dots and eyes, and picking colors
The customize section lets you change shapes and colors.
- Data dot shape: square, circle, rounded square, diamond or heart.
- Eye outer and eye inner: for the three large corner squares (the eyes), choose the outer frame and the inner dot separately from square, rounded square and circle. When you change an eye shape, the area under it is cleared to the background color before the new shape is drawn, so the photo never bleeds into the eyes.
- Dark dot color and light dot and background color: the defaults are black and white. The light color also fills the empty space left when you shrink the photo, the transparent areas and the margin around the code.
Whenever you change colors, check the contrast between the dots and the background. If the ratio falls below 4:1, the app shows a low-contrast warning. Pastel dots, or dots close to the background color, look lovely to people and blurry to cameras. Keep the dark dots truly dark and the background light. Unusual dot shapes such as hearts or diamonds can be harder to read than squares or rounded squares, so change one thing at a time and check after each change.
Reading the scan badge, and a checklist before you print
The preview area shows a badge that reports a scan check. It actually tries to read the preview, and there are two outcomes.
- Scan verified: the app read its own preview without trouble.
- May be hard to scan: scanning may be difficult. A hint to enlarge the dots and adjust position and brightness appears along with it, and the list of scan notes can name a specific cause such as low contrast.
One caution: Scan verified is the result of the app reading its own preview. It is not a guarantee that every phone and every scanner app will read your code. Phone model, camera quality, print quality and lighting all change the outcome, so treat the badge as a first gate and never as a replacement for testing on real devices.
- Confirm the Scan verified badge is showing and no warnings remain. If there is a low-contrast warning, fix the colors first.
- Scan the downloaded file, not the editor preview.
- Print one copy at the real final size first. A code that reads on screen can still smudge when printed small.
- Scan it with both iPhone and Android, with the built-in camera and with a separate scanner app.
- Test from the distance and angle where a person will actually stand or sit, under the real lighting.
- Confirm the page that opens is the one you intended. A successful scan and a correct destination are two different things.
- Re-check your right to use the photo, and for pictures of people, confirm you have consent.
Recent images and privacy
Picking the same file again for every tweak gets tiresome, so uploaded images are kept in a recent images list. It stores originals of 5 MB or less, up to 8 of them, and drops the oldest when the list is full. Larger files can still be edited but are not saved to the list. Tap an image in the list to load it again, and you can delete items one by one or clear them all.
The list lives only in the browser you are using and is never sent to a server. Logos, image shapes and image QR codes share the same list. Clearing the list does not remove the image you are currently editing, and deleting the site data in your browser wipes the list as well. If you use a personal photo on a shared computer, press Clear all when you are done.
Try it in Mandu QR
Mandu QR is a free tool that runs in your browser with no sign-up. Besides image QR codes that use a photo, you can make shaped QR codes (mandu, heart, couple and more), framed codes with a caption and Wi-Fi QR codes, then save them as PNG or SVG. What you type and the images you upload are not sent to a server. Start with a simple photo that has strong contrast, adjust one step at a time, and always scan the printed copy at the end.
"QR Code" is a registered trademark of DENSO WAVE INCORPORATED.