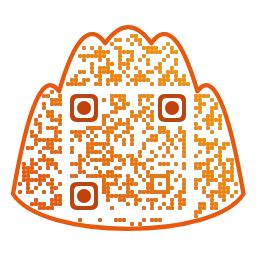
Putting a Logo or Emoji in the Center of a QR Code: Why It Still Scans
A logo or emoji in the middle of a QR code still scans thanks to error correction. Learn the logo size limits and warnings, built-in icons versus uploads, how to send an emoji from Emoji Maker, how to prepare a logo image, and how to test on real phones.
- Published
- Updated
You have probably seen QR codes with a brand logo or a cute emoji sitting right in the middle. It seems odd that a phone can read a code when a picture covers its center, where the dots are packed most tightly. Once you understand why it works, the practical questions answer themselves: how large the logo can be, and what kind of image to pick. This guide covers the principle briefly, then focuses on the hands-on side of adding a center logo. General advice about decorated QR codes lives in a separate guide, so here we stay with the logo.
Why a QR code can be partly covered and still scan
Every QR code carries a safety net called error correction. When data is encoded, extra recovery information is stored alongside it, so even if part of the code gets dirty, scratched, or torn, the camera can reconstruct the original content from what remains. Placing a logo is really a deliberate act of hiding part of the code, and the hidden part is paid for out of that recovery budget.
There are four levels: L, M, Q, and H. By the widely cited standard values, they can recover roughly 7%, 15%, 25%, and 30% of the code. A higher level survives more damage, but the same message needs more dots, so the pattern becomes denser.
- L (about 7%): meant for clean on-screen use. There is little room to spare for a logo.
- M (about 15%): the usual default level.
- Q (about 25%): tolerates light decoration or minor damage.
- H (about 30%): the sturdiest level, and the best fit when a logo is involved.
One common misunderstanding deserves a note. Being able to recover 30% does not mean you can cover 30% of the code with a logo. The area you hide does not map one-to-one onto the recoverable share, and real-world noise such as camera shake or ink spread eats into the same reserve. The share you actually give to a logo should be well below the theoretical ceiling.
Adding a logo raises error correction automatically
In Mandumon QR you do not have to manage this setting yourself. When you turn on the center logo, error correction is set to H automatically, and a short hint on screen tells you so. Without a logo the app may use a lower level depending on the situation; the moment you add one, it moves up to the sturdiest level.
There is a price. At level H the same address needs more dots, so on a page of the same size each dot becomes smaller, and the effect grows with the length of the address. If you plan to add a logo, keep the address as short as you can. A long address plus a logo produces a very dense pattern that can become hard to read when printed small.
Logo size limits and warnings: the actual numbers
Mandumon QR treats logo size as a ratio of the QR body's area, and that area includes the padding around the logo. The values built into the app are these.
- The default is 8% of the QR body.
- Above 10% you get a warning that the logo is large, scanning may be difficult, and that you should check on a real device before downloading.
- The upper limit is 20%. If you ask for more, the logo is reduced to 20% or less and a notice tells you it was reduced.
The logo area snaps to the QR's dot grid and is always centered. The number of dots across is adjusted to be odd, so the size you see can differ very slightly from the percentage you entered. Inside that area the artwork is also drawn a little inset from the edges, so the image itself appears slightly smaller than the logo area.
The way to read these numbers is simple. Start near the default and treat 10% as a signal that says: from here on, verify it yourself. A missing warning is not a guarantee that every device will read the code, and the 20% cap is the most the app will allow, not a recommended value.
Built-in icons or an uploaded logo?
The center logo comes in two kinds: an icon built into the app or an image you upload. You pick one or the other, never both at once.
- Built-in icons: link, Wi-Fi, camera, and chat bubble. They are drawn simply in the code's own color, so contrast stays dependable, and there is no image to prepare. If your QR has a clear purpose, this is the safest choice.
- Uploaded logo: PNG, JPG, or WebP files up to 15 MB. Use it when you want to show your own brand or character. The image is processed only inside your browser and is not sent to a server.
If this is your first time, confirm that the code scans with a built-in icon, then swap in your own logo. If the built-in icon reads fine at a given size but your logo does not, the image is the cause, which makes it much easier to know what to fix.
Sending an emoji from Emoji Maker into the QR center
An emoji is the easiest logo of all. If you have already made one in Emoji Maker, from text or from an image, you can use it as the QR logo directly. The emoji preview area in Emoji Maker has a button labeled "Create a QR with this emoji".
- Make your emoji in Emoji Maker.
- Press the button and the designed QR page opens in a new tab. If no tab appears, your browser may have blocked the pop-up, so allow pop-ups and try again.
- Once the new tab is ready, your emoji is applied as the center logo, the page switches to design mode, and a notice saying the emoji was placed as the logo appears for three seconds.
- Enter the link the QR should hold, adjust the logo area, and save.
The handoff happens only between two browser tabs. The emoji image does not travel through a server; the open tabs pass it to each other inside your browser. The receiving page accepts only a PNG image coming from the Emoji Maker site and ignores other formats, outside addresses, and images whose size is out of range. The image has to arrive within ten seconds of the page getting ready, and after the first emoji is received, further messages are ignored. Anything you already typed, such as the link, stays untouched.
The emoji follows exactly the same rules as any other logo: the same size limits and warnings, and error correction forced to H. Emoji are colorful with rounded outlines, which makes them a good fit for a logo, but if you get greedy with the size they can fail to scan just like any other image, so check them the same way.
Reusing recently uploaded images
When you compare several logo candidates, you end up picking the same files over and over. Mandumon QR keeps successfully loaded uploads in a Recent images list to save you that effort.
- Only originals of 5 MB or less are kept, up to eight of them, newest first, and the oldest are dropped first.
- Files above 5 MB can still be used as a logo within the 15 MB upload limit, but they do not appear in the list.
- Tapping an image in the list loads it as the logo without picking the file again. The same list is shared with the image shape and image QR features.
- You can remove items one by one or empty the list with the clear-all button.
The list is stored only in the browser you are using and is never sent to a server. If you used a personal image on a shared computer, clear the list or the browser's site data when you are done.
How to prepare your logo image
Even at the same size, the image you choose changes how reliably the code reads. A few habits noticeably reduce failures.
- Use a PNG with a transparent background. A leftover white rectangle looks awkward and makes the logo seem bigger than it needs to be. With a transparent PNG, only the outline of your artwork sits on the code.
- Keep the shape simple. At small sizes, thin lines and tiny text turn to mush. Bold, simple shapes, a single letter, or a single emoji stay recognizable.
- Secure contrast. If the logo is too pale, or a dark color close to the QR dots, it blends with the surrounding dots. Make it a clear color that stands apart from them.
- Trim it close to a square. A very wide logo ends up looking much smaller in the same area.
- Avoid photographs. When shrunk, detail disappears and colors turn muddy. If you must use one, choose a photo with strong contrast and a large subject.
- Make sure you have the right to use any image that is not your own.
The scan badge and testing on real devices
The preview area shows a scan status. While it checks, you see "Checking scan..."; when all is well, it says the scan is verified; and if the code may be hard to read, it shows a caution along with advice to raise color contrast or reduce the logo size. As you enlarge a logo, watch where this indicator changes and you get a feel for how far is safe.
Still, the badge is only a guide. Camera hardware and scanning apps differ from phone to phone, and printed paper behaves differently from a screen. A verified badge does not promise that every device will read the code, so the final verdict belongs to real devices.
- Scan the downloaded file, not the preview on your screen.
- Print one copy at the real size you will use. The smaller the print, the more it hurts to lose dots behind the logo.
- Try both an iPhone and an Android phone, with the default camera app and a separate scanner app. If you can, test an older model too.
- Scan from the distance, angle, and lighting where people will actually stand or sit.
- Confirm that the page that opens is the address you intended. Reading successfully and landing in the right place are two different things.
If it reads poorly, undo one change at a time. Reducing the logo area helps most, followed by raising the contrast between dots and background, printing larger, and shortening the address. That order is a rule of thumb, not a standard, so trust your own test results first.
Finally, mandumon QR is a free tool that runs in your browser without sign-up. You can make shaped QR codes, image QR codes, framed QR codes with captions, and Wi-Fi QR codes, and save them as PNG or SVG. What you enter is not sent to a server. Start lightly with a built-in icon or an emoji, grow the logo area in small steps from around 8%, and scan the saved file each time to find the limit yourself. If you are not happy with a logo, you can switch between built-in icons, uploads, and emoji as many times as you like.